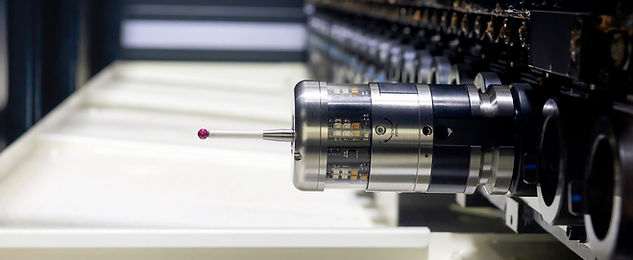
ESPRIT offers a powerful suite of multi-axis probing cycles for any combination of CNC machine, control, and touch probe manufacturer. ESPRIT Multi-Axis 3+2 probing cycles may be added at any point during the part program and combined with other ESPRIT cycles into one complete part program to support all machining and on-machine inspection needs. Using the ESPRIT Digital Machine, probing cycles are automatically chosen based upon the part geometry selected for inspection. Simulation is performed prior to machining to verify the probing in combination with all other machining processes. Finally, edit-free G-code is generated to activate the corresponding probing cycles embedded in the physical machine's control.
-
A powerful suite of probing cycles
-
Naturally integrated into the ESPRIT workflow
-
Universally available for any CNC machine, control, and touch probe
-
Combining machining and inspection into one complete program
Workpiece Location
ESPRIT's multi-axis probing cycles may be used on the stock or workpiece to dynamically update work offsets, which then provide accurate data to be used for subsequent machining operations. In this scenario, when material is loaded, new datum points are established for the stock’s exact location, accounting for variances in the workholding and part loading. For parts with varying stock, such as castings and forgings, ESPRIT's probing cycles are used to establish accurate datum points and alignment to ensure the subsequent machining processes are adapted to variations in stock conditions.
-
Probe the workpiece and establish datum points
-
Dynamically update work offsets
-
Account for variances in workholding and stock
-
Datum points and alignment for castings and forgings


Misload Detection
An unexpected setup or a misload of the CNC machine introduces the risk of damage to the workpiece or, worse yet, a collision on the machine. ESPRIT's probing cycles may be used to detect inaccuracies in material loading, fixture installation, and fixture component positioning. Using the probing cycles the workpiece setup may be verified prior to machining assuring that the program is run in the expected environment.
-
Confirm part loading and verify workholding
-
Assure the program is run in the expected environment
-
Avoid risk of damage to workpiece and machine
On-Machine Inspection
On-machine, in-process inspection of parts after machining will provide consistent and accurate measurements by eliminating manual measuring errors. All the commonly needed inspection routines are readily available within ESPRIT for use on any class of CNC machine tool. By selecting the part geometry to measure, ESPRIT will automatically identify the probing routine and its required parameters. With 4- or 5-axis machining, ESPRIT's 3+2 Probing cycles will orient the part using the rotary axes prior to activating the machine's probing cycle for accurate measure of multi-axis workpieces.
-
Consistent and accurate measurements
-
Automatically identifies probing routine and required parameters
-
Eliminates manual measuring errors

Dynamic Tool Offsets
For part features with tight tolerances, ESPRIT's probing cycles are used to dynamically update the tool offsets prior to final machining based upon the remaining stock as measured in real time by the probing cycle. This enables the program to automatically adapt to any potential tool wear, allowing critical part features to be machined to exact tolerances.
-
Program automatically adapts for tool wear
-
Machining critical part features to exact tolerances
-
Dynamically update tool offsets prior to final machining

Machine Aware Probing
-
Using a combination of ESPRIT's Multi-Axis 3+2 Probing and CNC machines outfitted with touch probes, shops will benefit with increased throughput on existing equipment while reducing operator intervention. This benefit comes along with increases in part consistency and quality.
-
Automatic cycle selection based on selected geometry
-
Workplane determines probe orientation
-
Preview of probing pattern
-
Automatic link generation for all positioning moves
-
Stock-aware, collision-free and optimized for cycle time
-
Full simulation of the machining and inspection processes
-
Edit-free G-code using probing cycles of the CNC


-
3+2 Probing cycles for any class of CNC machine tool
-
Available at any point in the program
-
Use of the workplane to determine probe orientation
-
Automatic cycle verification based on selected geometry
-
Probing pattern visualization
-
Supported probing cycles include:
-
Single Surface
-
Web/pocket
-
Corner
-
Bore/boss
-
Bore/boss on pitch circle
-
3-point bore/boss
-
Rotary axis measurement
-
Feature to feature
-

